Apple Pencil Pro tips and tricks: How to use the new iPad stylus, and get the most from its gesture and barrel roll features
Get started with Apple Pencil Pro.
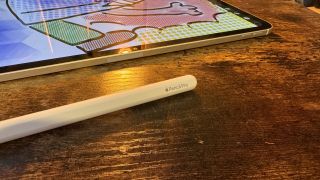
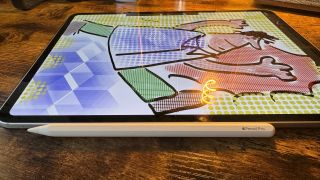
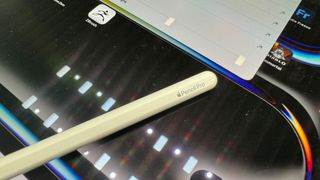
The Apple Pencil Pro is now available alongside new versions of Apple’s best iPads, the M4 iPad Pro and the iPad Air 6. The new Pencil boasts the Pro moniker we’ve come to expect from Apple’s high-end products and with it comes some brand new features we’ve never seen on Apple Pencil before.
This quick guide will give you all the info you need to get started with the Apple Pencil Pro and show you the new features of the Pro stylus such as barrel roll and Squeeze. Here’s how to use Apple Pencil Pro, Apple’s next evolution in its iPad stylus lineup.
- How To use Apple Pencil (1st & 2nd Generation): The ultimate guide
- Apple Pencil alternatives: The best non-Apple stylus for iPad
- The Apple Pencil Pro won't work with your old iPad
How to pair Apple Pencil Pro
The Apple Pencil Pro is compatible with the brand new M4 iPad Pro with its gorgeous OLED display as well as the iPad Air 6. If you own an older iPad Pro like the 2022 M2 iPad Pro then you’re out of luck and will have to upgrade to the newer tablet to benefit from everything Apple Pencil Pro has to offer.
- Ensure your M4 iPad Pro or iPad Air 6 is on and unlocked
- Magnetically attach the Apple Pencil Pro to the side of your iPad
- Tap Pair when the pairing request appears
Just like the Apple Pencil 2, pairing is completely seamless so if you’ve ever used an Apple Pencil before you’ll feel right at home with the Pencil Pro.
How to charge Apple Pencil Pro
Are you worried about the Apple Pencil Pro’s battery life? Fret not, Apple makes charging the Pencil Pro an absolute breeze. Any time the Pencil Pro is connected to the magnetic strip on the side of your iPad it will charge.
The Apple Pencil Pro uses fast charging technology just like the Apple Pencil 2 and a 15-second charge can get users up to 30 minutes of use. If you constantly use your Pencil Pro with your iPad, however, you’ll never have to worry about the battery as the iPad should always keep the charge topped up.
How to use barrel roll on Apple Pencil Pro
One of the major upgrades in the Apple Pencil Pro over its predecessor is a feature that Apple is calling barrel roll. This allows you to change the orientation of the shaped pen and brush tools by rotating the Pencil’s barrel — exactly as it would with pen and paper.
Master your iPhone in minutes
iMore offers spot-on advice and guidance from our team of experts, with decades of Apple device experience to lean on. Learn more with iMore!
To use barrel roll simply rotate the Pencil Pro as you’re using it in a compatible app like Notes, Zinnia, or Procreate. Barrel roll unlocks calligraphy on iPad like never before, allowing you to perfect your handwriting by adding a new dimension to your strokes. It works best with brushes that aren’t a perfect circle point, and really well alongside the ‘Hover’ feature — put your Pencil tip near the screen without touching it, and you’ll see the exact angle that the brush will touch down on as you rotate it.
How to use Squeeze on Apple Pencil Pro
Another new feature on the Apple Pencil Pro is the Squeeze gesture that adds a new dimension to the way you interact with your favorite creative apps like Procreate.
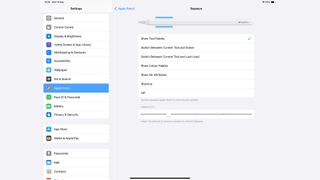
It’s up to the developers of each individual app to decide how they want to use the Squeeze gesture but at the moment Apple’s own Notes and Freeform allow you to use the gesture to access a tool palette. Squeeze can also be customized in Settings, allowing you to choose between different functionality like the ability to Squeeze to erase or to switch to the last tool you used.
To use Squeeze, simply Squeeze the sides of your Apple Pencil Pro, it couldn’t be more easy to activate. It’s so easy to activate, that iMore’s Gerald Lynch has highlighted he often accidentally triggered the Squeeze gesture while testing the Apple Pencil Pro — not ideal but hopefully something that just takes a little practice to get used to. If you find that happens to you too, note that you can adjust the pressure sensitivity needed to trigger the gesture in settings.
To change what action the Squeeze gesture triggers by default:
- Open Settings
- Select Apple Pencil
- Tap Squeeze
- Choose between multiple options including Show Tool Palette, a Shortcut, and more
- Adjust Squeeze sensitivity to your liking
How to use Double-Tap on Apple Pencil Pro
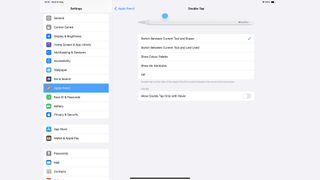
Double-Tap, a feature that is incredibly useful for Apple Pencil 2 owners, returns on Apple Pencil Pro with all the same settings you know and love. The flat side of the Pencil Pro acts as a Double-Tap input that you can use to do different things like switch between a tool and an eraser in certain apps or show ink attributes. Another fantastic use of Double-Tap is the ability to select using the Pencil Pro without touching the screen, this allows you to hover above selection choices and choose them by tapping twice on the side of your Pencil. Here’s how to turn it on:
- Open Settings
- Select Apple Pencil
- Choose Double-Tap
- Toggle on Allow Double Tap Only with Hover
Get used to haptic feedback
Another Apple Pencil Pro major selling point is the addition of haptic feedback in a Pencil for the first time ever. While there’s nothing you need to learn in terms of using haptic feedback, it’s worth noting that every time you Squeeze or interact with your iPad’s display in a certain way you’ll feel a light haptic tap.
So just be prepared for haptic feedback and know that when you feel a little rumble, your Pencil Pro isn’t broken. It's part of Apple’s magic way of making a stylus feel more like an actual drawing instrument.
Never lose your Pencil again
The Apple Pencil Pro has a final nifty feature that may be the reason you want to pick one up in the first place. If you’ve ever lost your Apple Pencil around the house and not been able to find it, the Pencil Pro has you covered. Apple Pencil Pro now has Find My compatibility allowing you to track the location of your Pencil in a similar way to AirPods Pro 2. Using Find My, you can locate your misplaced Pencil easily, here’s how:
- Open Find My
- Tap Devices
- Select Apple Pencil Pro
Your iPhone or iPad will now direct you to the location of your Apple Pencil Pro, giving you an indication of distance as you get closer to the device. It’s a nifty feature that comes in really handy for those of us who leave things around the house on a regular basis.
John-Anthony Disotto is the How To Editor of iMore, ensuring you can get the most from your Apple products and helping fix things when your technology isn’t behaving itself. Living in Scotland, where he worked for Apple as a technician focused on iOS and iPhone repairs at the Genius Bar, John-Anthony has used the Apple ecosystem for over a decade and prides himself in his ability to complete his Apple Watch activity rings. John-Anthony has previously worked in editorial for collectable TCG websites and graduated from The University of Strathclyde where he won the Scottish Student Journalism Award for Website of the Year as Editor-in-Chief of his university paper. He is also an avid film geek, having previously written film reviews and received the Edinburgh International Film Festival Student Critics award in 2019. John-Anthony also loves to tinker with other non-Apple technology and enjoys playing around with game emulation and Linux on his Steam Deck.
In his spare time, John-Anthony can be found watching any sport under the sun from football to darts, taking the term “Lego house” far too literally as he runs out of space to display any more plastic bricks, or chilling on the couch with his French Bulldog, Kermit.
